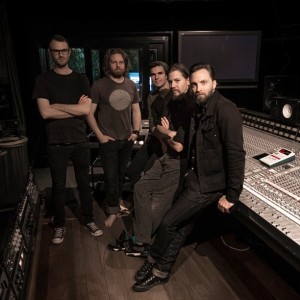
 Whether it’s your first time recording, or you’re a Pro Tools veteran, good preparation before going into the studio can save you hours, if not days of wasted recording time.
Working with an experienced producer can take some of the guesswork out of the recording process, however this is not always possible during preproduction.
Budget, availability or lack of knowledge often means that artists are not ready when they step into the recording studio. Correct preparation creates a great recording experience.
Here are some basic steps that I recommend to all my clients before they come to my studio to record:
1. Preproduction
Preproduction is the single most important activity a band can undertake to improve their final recording result. Essentially, it’s a practice recording in preparation for the real thing. It helps each musician hear how their parts sound and interact with the other instruments in the band. The band can then make decisions on arrangements and musical content from an active listening perspective rather than during performance or rehearsal.
If someone in the band has access to a home recording setup, that’s great. You don’t need a huge recording rig for preproduction recordings. There should be someone in your network that is tech savvy enough to run GarageBand at least, but if not, hit up your local audio engineering college and ask if there are any students interested in recording your music. Generally these kids are keen and competent enough to get a demo down. Obviously, these are free options for an artist looking to save some dollars.
However, if you are looking to get the most out of your preproduction sessions, you should book time with your producer and work with them during the formative, creative stage of your composition.
2. Performance, timing and dynamic
If you write your music in the rehearsal room, start with a live recording. You’ll be able to capture the true dynamic and flow of your song, which can then be used by your producer to map out timing changes and volume dynamics. When I work with a band, I listen to their live takes to hear the natural ebb and flow of the songs timings. I then beat map these different tempos into Pro Tools. I may find that the post-chorus sounds better played slightly slower than the chorus so I’ll map these different tempos onto my timeline and have my click track reflect these changes.
If you write your music on the computer, which a lot of artists prefer these days, then try experimenting with some fine tempo adjustments throughout your song. Unless you’re writing dance music, keeping a song as a single tempo can be quite bland. I usually find increasing the tempo of a chorus anywhere between 1-3bpm, can give it some extra energy, without there being a perceptible increase in tempo. Try this throughout the different sections of your composition to breath life into a computerised writing environment.
If you are able map your tempo changes to a click track and record your preproduction to it, then those tempo maps can be of great help when it comes to the main tracking day. If the preproduction session is polished enough, I use parts of it as a guide during our main recording session.
I also recommend that each member practice their parts with the preproduction sessions, in the time leading up to the main recording.
3. Demo-itis
 Demo-itis is an affliction that affects almost all musicians and many producers. “But it doesn’t sound as good as the demo”, they say. Sometimes this is true, quite often it isn’t.
Often, songwriters become very attached to particular arrangements and begin to lose perspective on what actually sounds good. This is one of the perils of self production and home recordings.
An experienced ear can enhance a song or production in ways that the original artist may not have considered.
Demos and preproduction are a time to explore all possibilities and prepare for race day, and not everything will be good. That being said, sometimes during preproduction you’ll capture a magic performance that proves difficult to recreate in the main studio. I’m a firm believer in performance coming first over perfection.
So when it comes to guitars or bass, I always record with DI’s or direct input during preproduction. This might be in the form of a Hi-Z input on your audio interface, or as an external pre or DI box. With a DI you can usually send a copy of your guitar or bass signal to your amp as well as to your computer. By capturing the DI for your demos, you have the option to use demo material if it has some elusive quality about it.
A simple yet high quality DI that I recommend is the Radial Passive Direct Box. It runs a split signal and sounds great.
4. Creative time
Make sure you use this preparation time as an opportunity to explore all creative avenues. Sure, I love it when creativity strikes during our main recording session, however experimenting with an idea and then getting it down convincingly can take time.
It’s important to not to think:
“Oh I’ll just write all the backing vocals and harmonies when I’m in there.”
Or:
“We haven’t written the ending yet but, it’s cool man, we’ll wing something.”
Facepalm.
5. Know thy band members’ parts
If there is one thing that I can impart when if comes to being versatile and fully prepared for a studio session, it’s not only knowing your own parts intimately, but also having an understanding of your fellow band members’ parts. There is a close relationship between the drums and the bass and an implied understanding between players.
However, the guitarist should also know where every kick and snare is landing, what notes the bass is playing underneath the chords, and vice versa. This understanding can yield a more musical final result and can smooth out any discrepancies in performance, timing and harmony between players.
Practice makes perfect! Once everyone has consolidated their parts, then it’s only a matter of regular practice and rehearsal to ensure a confident performance on recording day.
6. Instruments and equipment
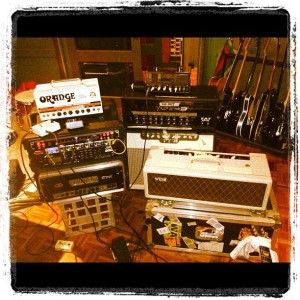 Making sure you have the appropriate instrument to record with is essential to getting a great sound. Classic sounds require classic instruments. Modern tones need modern equipment. To generate the sound you want, you need to choose the appropriate gear to record with.
Do you have the right snare drum for this song? How about those cymbals? Is that guitar suitable for the tone you want? A Fender Telecaster will sound great on a blues or rock record but it wouldn’t be my go-to choice for a metal band.
If you don’t own the gear you need and you can borrow equipment from a friend, great! Just make sure the equipment will be available for the duration of your recording:
“Hey buddy I need my bass back this weekend for a gig.”
“But we’re booked in the studio that night.”
Uh oh.
If you are unable to source your own equipment then speak to your producer. I have a few people in my network that I hire equipment from privately. However I’ve been keeping my eye on The Drum Cartel for their incredible range and convenient freight option. If you’re in Melbourne, Deluxe Audio hire quality guitars, basses and drums for pretty reasonable prices.
7. Intonation
 Once you have selected and acquired the appropriate equipment, then it’s essential that the string instruments are serviced and adjusted for intonation. Having a poorly setup instrument in the studio can waste hours of time fiddling about with tuning. And it can produce a less musical result.
Get your instrument setup by an experienced guitar luthier or technician and make sure they adjust it for the tuning you are using for that song. If you are in Melbourne, I highly recommend Cargill Custom Guitars for experienced guitar luthiers to look after your instrument.
I can’t be more enthusiastic about how great new bass strings sound vs ones that have been played in, even for just a couple of sessions. People may argue that it’s better to play them in but I prefer to take on the tuning challenges that new strings have, over the sound of dead strings and no tone. So…NEW STRINGS!
Same goes for drum heads. Make sure you have new drum heads for a recording and that they are appropriate for the sound you want. Clear heads will be brighter and more sustained, coated heads will be duller with shorter sustain. Different brands will sound different. I’m a huge fan of the Evans Level 360 technology, these drum heads sound amazing on recordings.
8. Expectations
I always spend a session getting to know the band or artist. I like to hear a performance of the material and try to get an understanding of where they are coming from creatively and what they what to achieve with the project. I then lay out a realistic vision for the record and make sure that everyone is on the same page. I believe this comes down to communication with all the members of the band and your producer.
Some people have unrealistic expectations of how a record will turn out, quite often due to budget, time constraints and lack of preparation. Being prepared for a recording helps with time constraints and can reduce the cost of your record. It means you have communicated your goals to your producer and everyone knows what they need to do to get a good result.
9. Having fun
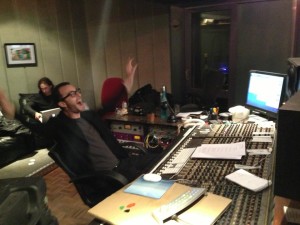 Most importantly, making music should be fun. In my work, fun can encompass a variety of emotions. I find enjoyment in the feelings that music evokes in me. Whether it’s a sadness in a vocal passage or the hilariousness of a cheesy guitar lick, I get pleasure from the emotions that I experience through music.
It’s this essence that I try to find in an artist and their music, to explore and bring out in a performance. If you can find an emotional place to draw a performance from, use it, as it can bring some magic to a recording.
Producing a record is a personal experience. There are high stakes to getting things right and the need to perform under stress. Good preparation can take the stress out of the recording experience and make the journey incredibly rewarding and enjoyable.
No Comments